How to install system into the rack of Dell PowerEdge R760?
How to install system into the rack of Dell PowerEdge R760? There are two options: Drop-in and Stab-in, here isthe detail.
Drop-in design means that the system is installed vertically into the rails by inserting the standoffs on the sides of the system into the J-slots in the inner rail members with the rails in the fully extended position . The recommended method of installation is to first insert the rear standoffs on the system into the rear J-slots on the rails to free up a hand and then rotate the system down into the remaining J-slots while using the free hand to hold the rail against the side of the system .
Stab-in design means that the inner (chassis) rail members must first be attached to the sides of the system and then inserted into the outer (cabinet) members installed in the rack .
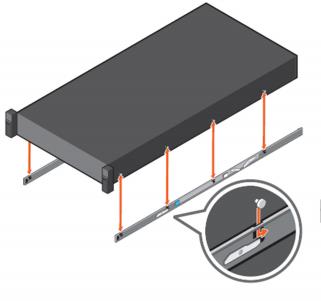
Installing system into the rack (option A: Drop-In)
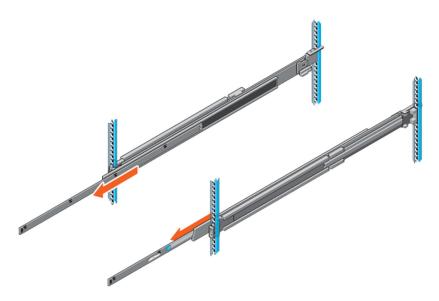
1. Pull the inner rails out of the rack until they lock into place .
2. Locate the rear rail standoff on each side of the system and lower them into the rear J-slots on the slide assemblies .
3. Rotate the system downward until all the rail standoffs are seated in the J-slots .
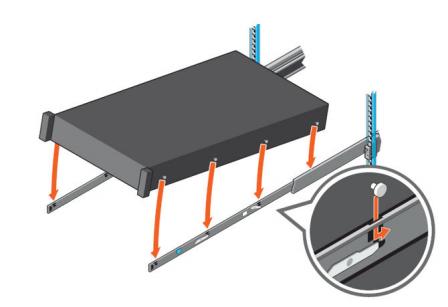
4. Push the system inward until the lock levers click into place .
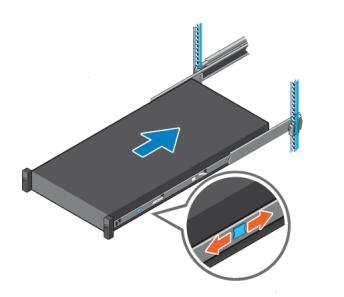
5. Pull the blue side release lock tabs forward or backward on both rails and slide the system into the rack until the system is in the rack .
Installing the system into the rack (option B: Stab-In)
1. Pull the intermediate rails out of the rack until they lock into place .
2. Release the inner rail lock by pulling forward on the white tabs and sliding the inner rail out of the intermediate rails .
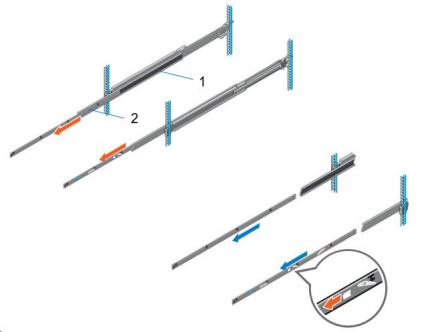
Rail component label
|
Number |
Component |
|
1 |
Intermediate rail |
|
2 |
Inner rail |
3. Attach the inner rails to the sides of the system by aligning the J-slots on the rail with the standoffs on the system and sliding forward on the system until they lock into place .
4. With the intermediate rails extended, install the system into the extended rails .
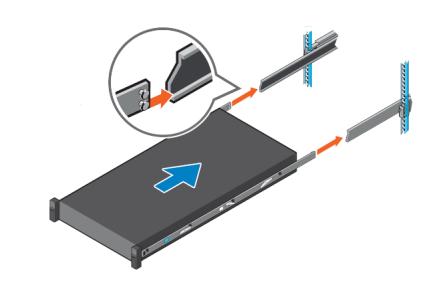
5. Pull blue slide release lock tabs forward or backward on both rails, and slide the system into the rack .